- Aim of this guide
- Step 1 - Install Rancher Desktop
- Step 2 - Check that everything is ok
- Step 3 - Create the environment for your Jekyll site
- Step 4 - Kubernetes entities
- Step 5 - Jekyll deployment
- Step 6 - Fix problems, if any
- Step 7 - Create the service or the port forward
- Step 8 - Go online
- Conclusion
I created my blog using Jekyll, a great open-source tool that can transform your markdown content into a simple, old-fashioned-but-trendy, static site.
What are the advantages of this approach?
The site is super-light, super-fast, super-secure and SEO-friendly. Of course, it’s not always the best solution, but for some use cases, like a simple personal blog, it’s really a good option.
Aim of this guide
Running Jekyll locally can be a little bit tricky, at least for me, as I’m not very comfortable with Ruby. So I decided to go for a containerized solution using Rancher Desktop.
This guide can be a good starting point to familiarize both with Jekyll and with Kubernetes. If you already know something about Kubernetes but you have never used it before, it could be an effective hands-on experience.
The idea is to make it easy to manage your blog using this pretty simple flow:
- Write your blog posts locally as a bunch of simple markdown text files
- Jekyll generates in real time the static site and serves it locally
- When you are satisfied with the result, just commit and push the changes
- An automated workflow will update the online “production” static website
The workflow is now up and running, and I am very happy with it, but I had some troubles making it work.
I’m on a Mac with macOS Sonoma 14.0.
So, here is the step-by-step guide to get it working.
Step 1 - Install Rancher Desktop
Nothing special to say here. I used brew, but you can of course install it as you prefer.
brew install rancher
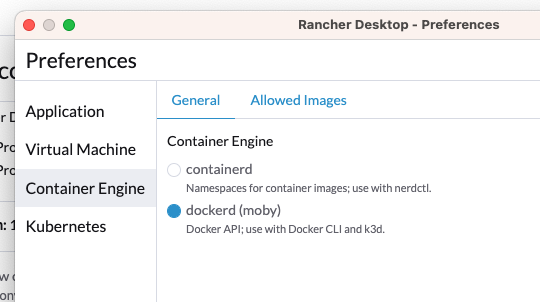
I configured Rancher Desktop to user dockerd as a container engine because I am more familiar with Docker.
Step 2 - Check that everything is ok
Check with kubectl that your local k8s cluster has been configured properly.
johndoe@macbook ~ % kubectl config get-contexts
CURRENT   NAME                CLUSTER            AUTHINFO          NAMESPACE
*         rancher-desktop     rancher-desktop    rancher-desktop
Check that you container engine can download images and execute them.
johndoe@macbook ~ % docker run --rm hello-world
Unable to find image 'hello-world:latest' locally
latest: Pulling from library/hello-world
70f5ac315c5a: Pull complete
Digest: sha256:4f53e2564790c8e7856ec08e384732aa38dc43c52f02952483e3f003afbf23db
Status: Downloaded newer image for hello-world:latest

Hello from Docker!
This message shows that your installation appears to be working correctly.

To generate this message, Docker took the following steps:
 1. The Docker client contacted the Docker daemon.
 2. The Docker daemon pulled the "hello-world" image from the Docker Hub.
    (arm64v8)
 3. The Docker daemon created a new container from that image which runs the
    executable that produces the output you are currently reading.
 4. The Docker daemon streamed that output to the Docker client, which sent it
    to your terminal.

To try something more ambitious, you can run an Ubuntu container with:
 $ docker run -it ubuntu bash

Share images, automate workflows, and more with a free Docker ID:
 https://hub.docker.com/

For more examples and ideas, visit:
 https://docs.docker.com/get-started/
During this step I had some network troubles with docker daemon pulling images.
It was needed to add some rules to my firewall to make Docker able to download them properly.
If you have an output like the one above, you can go on.
Step 3 - Create the environment for your Jekyll site
Main folder
Create a folder on your local machine. It will be the root folder of your git repo.
For example: /Users/johndoe/myblog
Kubernetes manifests’ folder
Create another folder for your YAML files.
For example: /Users/johndoe/myblog/k8s
This is the folder where we will place our .yaml files and execute kubectl commands
I created it inside the main folder, but it would be better to use a separate folder, because it’s not a good idea to push these file inside your future blog public repository. Remember to move it outside before your first commit.
Step 4 - Kubernetes entities
Create the namespace
Create a new file named namespace.yaml
apiVersion: v1
kind: Namespace
metadata:
  name: jekyll
and apply it:
johndoe@macbook k8s % kubectl apply -f namespace.yaml
namespace/jekyll created
Create PV and PVC
Now we can create a persistent volume and a persistent volume claim, to map a local folder into the container that will execute Jekyll.
Create a new file named volume.yaml
apiVersion: v1
kind: PersistentVolume
metadata:
  name: jekyll-pv
  namespace: jekyll
  labels:
    type: local
spec:
  storageClassName: hostpath
  capacity:
    storage: 256Mi
  accessModes:
    - ReadWriteMany
  hostPath:
    path: /Users/johndoe/myblog
  persistentVolumeReclaimPolicy: Retain
---
apiVersion: v1
kind: PersistentVolumeClaim
metadata:
  name: jekyll-pvc
  namespace: jekyll
spec:
  storageClassName: hostpath
  accessModes:
    - ReadWriteMany
  resources:
    requests:
      storage: 256Mi
and apply it:
johndoe@macbook k8s % kubectl apply -f volume.yaml
persistentvolume/jekyll-pv created
persistentvolumeclaim/jekyll-pvc created
Scaffold a new Jekyll site
In this step we will create a job to execute jekyll command to create a brand new site.
The docker image used is the official one: https://hub.docker.com/r/jekyll/jekyll/
Create a new file named job-create-jekyll.yaml
apiVersion: batch/v1
kind: Job
metadata:
  name: jekyll-create
  namespace: jekyll
spec:
  template:
    spec:
      containers:
      - name: jekyll-create-job
        image: jekyll/jekyll:latest
        volumeMounts:
          - name: jekyll-volume
            mountPath: /srv/jekyll
        command: ["/bin/sh"]
        args: ["-c", "jekyll new docs"]
      restartPolicy: Never
      volumes:
        - name: jekyll-volume
          persistentVolumeClaim:
            claimName: jekyll-pvc
  backoffLimit: 1
and apply it:
johndoe@macbook k8s % kubectl apply -f job-create-jekyll.yaml
job.batch/jekyll-create created
If everything works fine, the job should log something like this:
Running bundle install in /srv/jekyll/docs...
NB: to get k8s logs you can use kubectl, the kubernetes dashboard, k9s, Lens, Rancher… if you don’t know how to do it, take your time to get confidence with that.
Check your local folder, now you should find a new docs subfolder with a brand new Jekyll site.

If you like having a clean k8s cluster, it’s time to delete the job before going on.
Step 5 - Jekyll deployment
Update the PV path
Now that the site is ready to be served, we need to change the path of the persistent volume, because the folder that should be mounted in /srv/jekyll is the docs folder that has just been created.
Edit the file volume.yaml and add /docs at the end of the path.
[...]
  hostPath:
    path: /Users/johndoe/myblog/docs
[...]
Using your preferred Kubernetes management delete the volume and the claim.
For example with:
kubectl delete pvc jekyll-pvc -n jekyll
kubectl delete pv jekyll-pv -n jekyll
And apply it again:
johndoe@macbook k8s % kubectl apply -f volume.yaml
persistentvolume/jekyll-pv created
persistentvolumeclaim/jekyll-pvc created
Create the deployment
Create a new file named deployment.yaml
apiVersion: apps/v1
kind: Deployment
metadata:
  name: jekyll-preview
  namespace: jekyll
spec:
  replicas: 1
  selector:
    matchLabels:
      app: jekyll-preview
  template:
    metadata:
      labels:
        app: jekyll-preview
    spec:
      containers:
      - name: website
        image: jekyll/jekyll:latest
        ports:
          - containerPort: 8080
          - containerPort: 8081
        volumeMounts:
          - name: jekyll-volume
            mountPath: /srv/jekyll
        env:
        - name: JEKYLL_ENV
          value: "production"
        command: ["/bin/sh"]
        args: ["-c", "jekyll serve --trace --watch --force_polling --port 8080 --livereload --livereload-port 8081"]
      volumes:
        - name: jekyll-volume
          persistentVolumeClaim:
            claimName: jekyll-pvc-2
and apply it:
johndoe@macbook k8s % kubectl apply -f deployment.yaml
deployment.apps/jekyll-preview created
Step 6 - Fix problems, if any
Possible problem #1
When the pod started the first time I got this error message:
 /usr/gem/gems/jekyll-4.2.2/lib/jekyll/commands/serve/servlet.rb:3:in `require': cannot load such file -- webrick (LoadError)
 from /usr/gem/gems/jekyll-4.2.2/lib/jekyll/commands/serve/servlet.rb:3:in `<top (required)>'
 from /usr/gem/gems/jekyll-4.2.2/lib/jekyll/commands/serve.rb:179:in `require_relative'
 from /usr/gem/gems/jekyll-4.2.2/lib/jekyll/commands/serve.rb:179:in `setup'
 from /usr/gem/gems/jekyll-4.2.2/lib/jekyll/commands/serve.rb:100:in `process'
 from /usr/gem/gems/jekyll-4.2.2/lib/jekyll/command.rb:91:in `block in process_with_graceful_fail'
 from /usr/gem/gems/jekyll-4.2.2/lib/jekyll/command.rb:91:in `each'
 from /usr/gem/gems/jekyll-4.2.2/lib/jekyll/command.rb:91:in `process_with_graceful_fail'
 from /usr/gem/gems/jekyll-4.2.2/lib/jekyll/commands/serve.rb:86:in `block (2 levels) in init_with_program'
 from /usr/gem/gems/mercenary-0.4.0/lib/mercenary/command.rb:221:in `block in execute'
 from /usr/gem/gems/mercenary-0.4.0/lib/mercenary/command.rb:221:in `each'
 from /usr/gem/gems/mercenary-0.4.0/lib/mercenary/command.rb:221:in `execute'
 from /usr/gem/gems/mercenary-0.4.0/lib/mercenary/program.rb:44:in `go'
 from /usr/gem/gems/mercenary-0.4.0/lib/mercenary.rb:21:in `program'
 from /usr/gem/gems/jekyll-4.2.2/exe/jekyll:15:in `<top (required)>'
 from /usr/gem/bin/jekyll:25:in `load'
 from /usr/gem/bin/jekyll:25:in `<main>'
It’s an error related with this issue: https://github.com/jekyll/jekyll/issues/8523
It can be resolved by simply adding gem "webrick" at the bottom of the Gemfile located in the root folder of the site:
[...]
# Lock `http_parser.rb` gem to `v0.6.x` on JRuby builds since newer versions of the gem
# do not have a Java counterpart.
gem "http_parser.rb", "~> 0.6.0", :platforms => [:jruby]

gem "webrick"
And of course, you then have to delete the pod to trigger k8s to restart a new one.
Possible problem #2
After overcoming the previous problem, the pod started logging this error message:
[...]
chown: .jekyll-cache/Jekyll/Cache: Permission denied
chown: .jekyll-cache/Jekyll: Permission deniedchown: .jekyll-cache/Jekyll: Permission denied
chown: .jekyll-cache: Permission denied
chown: .jekyll-cache: Permission denied
[...]
I’m pretty sure that there could be a cleaner solution, but I resolved the issue with a rough but effective manual deletion of two folders before executing jekyll:
args: ["-c", "echo Cleaning temporary files...; rm -r _site; rm -r .jekyll-cache; echo ---Done--- && jekyll serve --trace --watch --force_polling --port 8080 --livereload --livereload-port 8081"]
Step 7 - Create the service or the port forward
Now you should finally have this output:
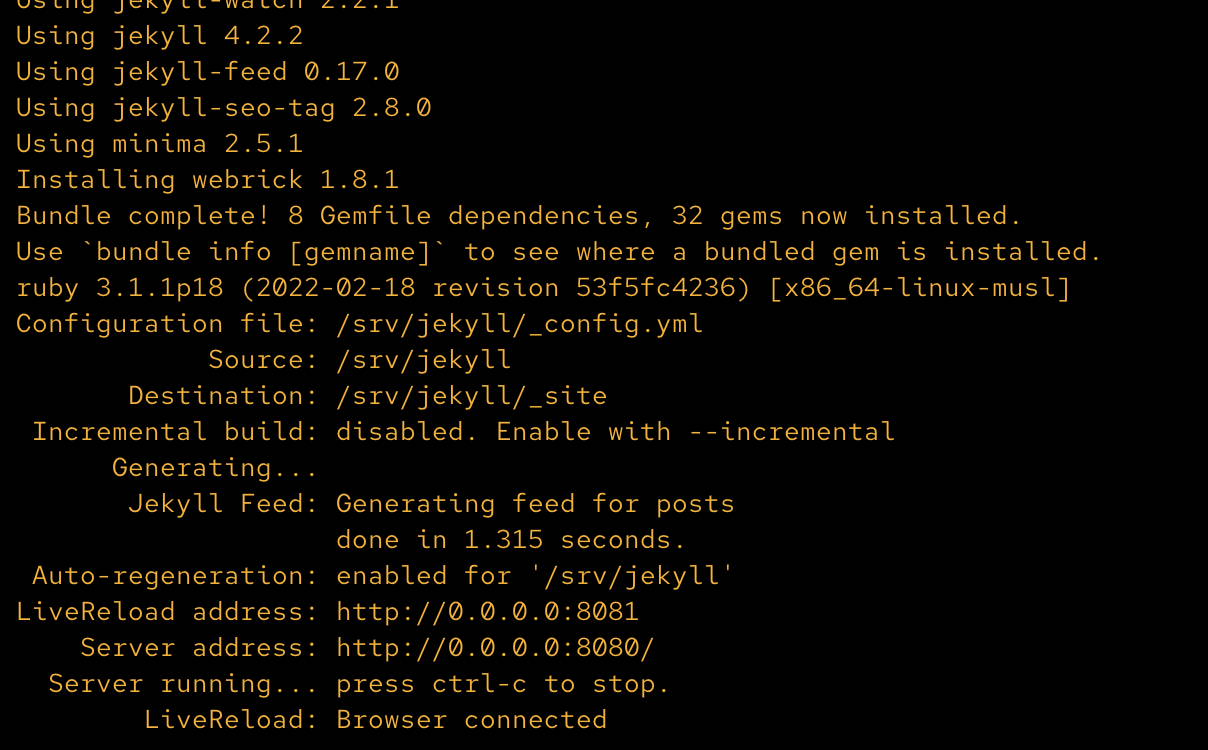
To make a quick check if the site is finally working, it is now possible to create a port forward from the pod to local host:
kubectl port-forward jekyll-preview-xyz123xyz-xyz12 8080:8080
A better solution is, of course, creating a service, which will be a more stable solution to reach your deployment.
Create the service
Create a new file named service.yaml
apiVersion: v1
kind: Service
metadata:
  name: jekyll-svc
  namespace: jekyll
spec:
  selector:
    app: jekyll-preview
  ports:
  - name: http
    protocol: TCP
    port: 8080
  - name: http-livereload
    protocol: TCP
    port: 8081
  type: LoadBalancer
and apply it:
johndoe@macbook k8s % kubectl apply -f service.yaml
service/jekyll-svc created
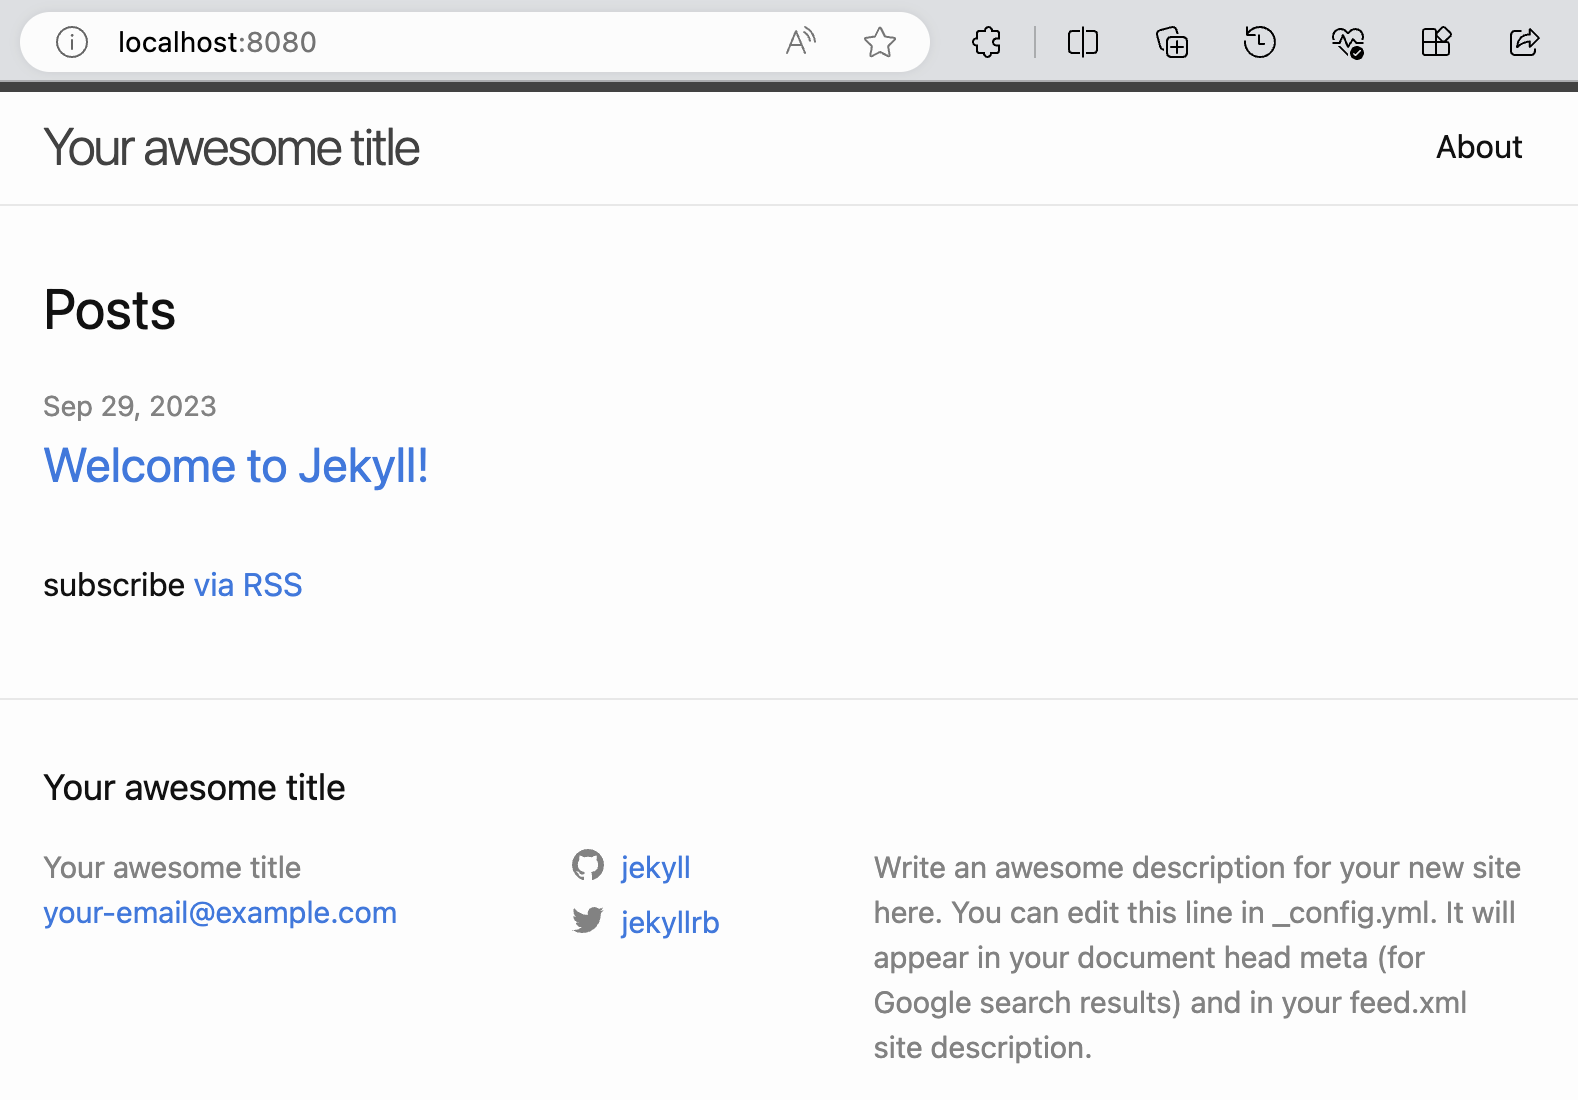
You can now point your browser to http://localhost:8080 and here we are!
Enjoy livereload
It’s time to try the complete solution, with the cool live-preview feature, from the original markdown file to the local online static site.
Edit a file, for example the sample post that Jekyll has created for you, and try to change something.
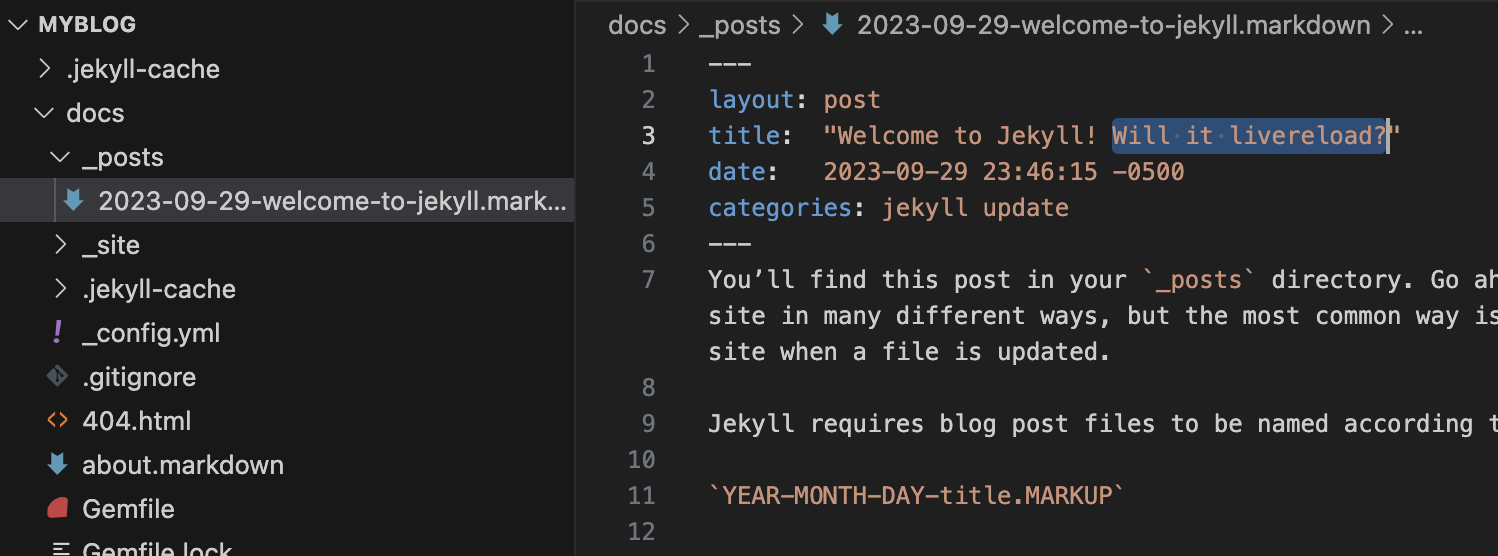
Save the file and, after a few seconds, you should see your browser automatically refresh the page and show your change.
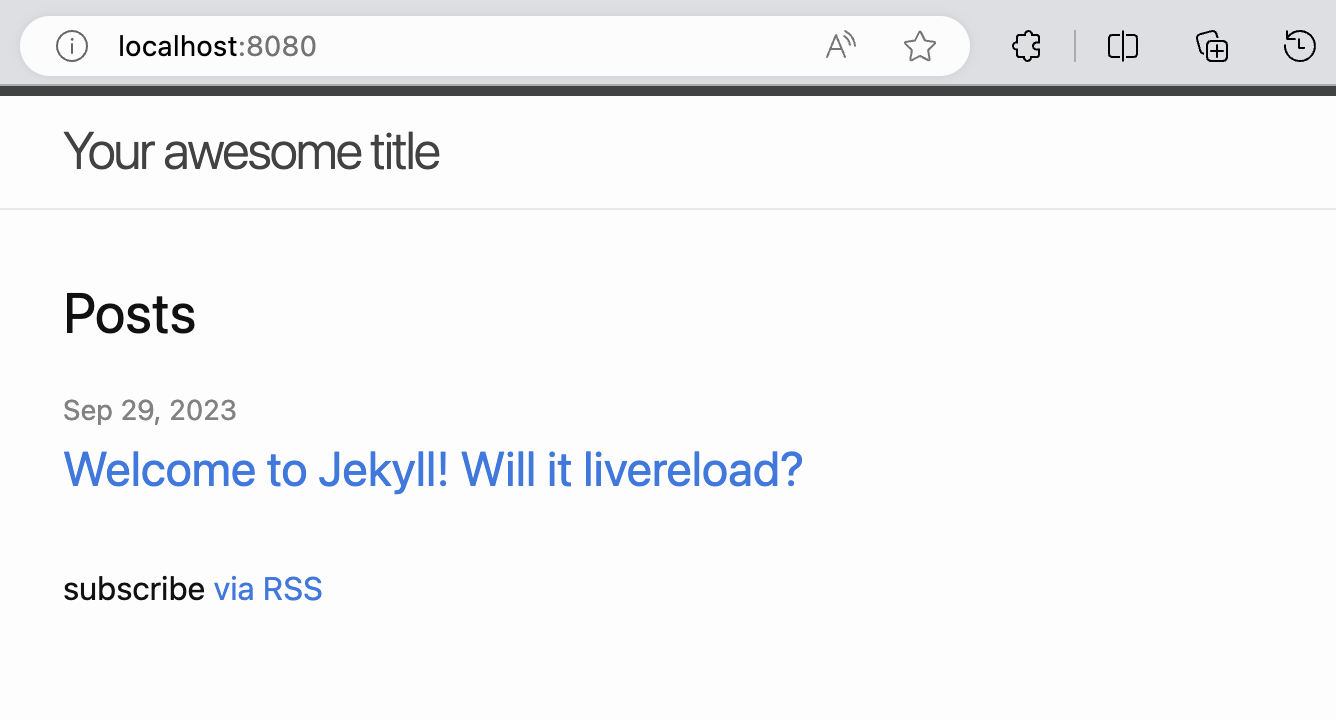
I find that this is perfect if you work with two screens, editing the markdown in the first screen while checking the final result on the second one.
Build your site
Now that you have a local working deployment of Jekyll, you can play with it and build your site. You can add themes, change styles and add contents.
When you are satisfied with the result, you are ready to put it online, accessible to everybody.
Step 8 - Go online
Being a simple static site you have now many options to expose the site on the public web, and the interesting point is that you don’t need costly computing resources.
Option A - Deploy on Amazon S3
If you are familiar with AWS, this is definitely one of the simplest options to put your site online.
-
Create a new S3 bucket, disabling the option Block all public access

-
Upload all the content of the
_sitefolder into the bucket. -
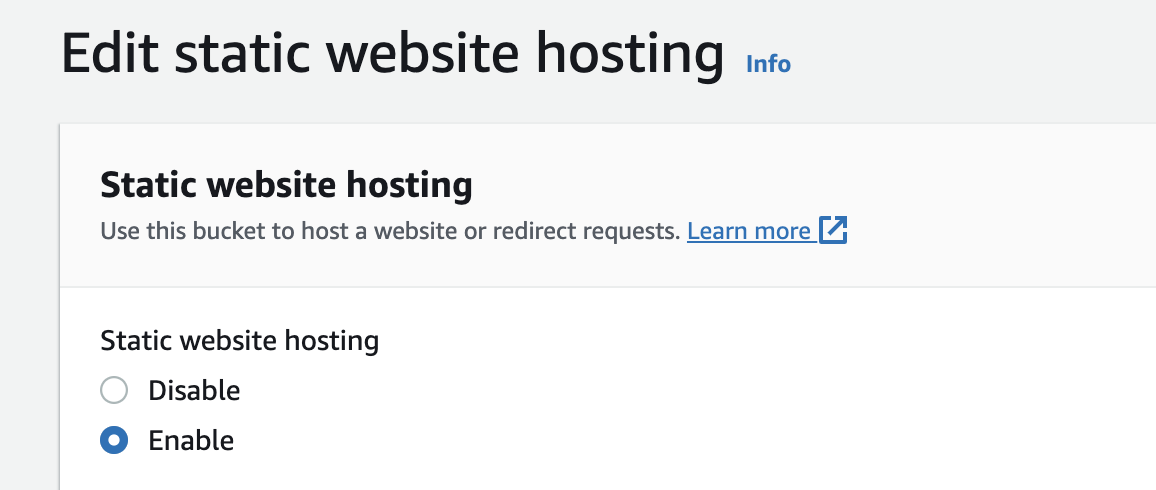
Open the Properties tab and enable the Static website content feature.
-
Confirm the index document filename as
index.htmland save. - Open the Permissions tab and edit the bucket policy as follows (use your bucket name in the Resource field):
{ "Version": "2012-10-17", "Statement": [ { "Sid": "PublicReadGetObject", "Effect": "Allow", "Principal": "*", "Action": "s3:GetObject", "Resource": "arn:aws:s3:::johndoe-blog/*" } ] } -
Now you can point your browser to the bucket web address:
http://johndoe-blog.s3-website.eu-north-1.amazonaws.com.
(You can find it at the bottom of the Properties tab) - The last action is to create or update a CNAME record in your DNS provider configuration console, in order to map your custom domain name to the S3 website url:
johndoe.com CNAME my-awesome-site.com.s3-website-us-east-1.amazonaws.com
To automate the deploy there are many options.
-
The simpler one is probably to use the AWS CLI with the command
aws s3 sync. In this case you will simply sync your output folder_sitewith the bucket root. -
A cleaner solution could be using CodeCommit and CodePipeline to automate the S3 bucket update when you push your changes to your git repository. You can follow this tutorial for more information about this procedure.
Option B - GitHub pages
Another interesting option is using GitHub + GitHub Pages + GitHub Actions.
In this case you can leverage this interesting workflow:
- Put all your source code in a repository named
<your-github-username>.github.io - Commit and push your changes
- GitHub Action will do all the magic
- Point your browser to
https://<your-github-username>.github.ioand enjoy
If you want to try GitHub Actions this could be a good way to start familiarizing with it.
An important point to highlight, that can be considered good or bad depending on the point of view, is that in this case the static site will be generated by another instance of Jekyll managed by GitHub, so you will have to check that everything is fine and corresponds to the output of you local Jekyll instance.
Conclusion
I hope that this guide can be useful to someone, for me it has been an interesting learn-by-doing experience.
If you see errors or you have any suggestions to handle the process in a better or cleaner way, I will be happy to integrate it and improve the solution.